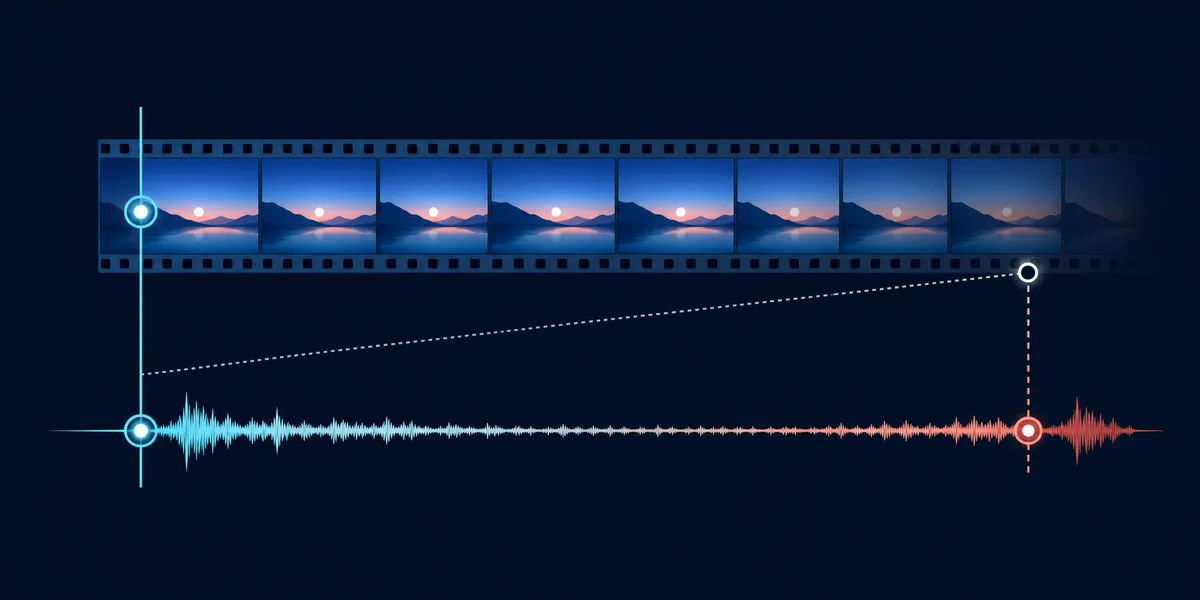
You likely have audio drift when the audio and video are close at the start but the gap is clearly larger in the middle and end. Test one unchanged file or stream at three time points, note whether the gap grows in one direction, and first rule out a player-specific offset. A fixed delay can be corrected with one offset; drift usually needs matching sample or frame rates, a clean resample or transcode, a stable capture path, or a new source recording.
The sound is early or late by roughly the same amount from beginning to end.
The start looks close, but the mismatch becomes larger as the file or stream continues.
The timing changes suddenly instead of moving steadily, which points to buffering, drops or scheduling.
The same file is fine elsewhere, so check the player, browser, capture source or display route first.
What is audio drift, and how is it different from delay?
Audio drift is a timing-rate problem. The audio and video do not stay separated by one constant amount; their relationship changes as time passes. A recording can begin in sync, look slightly wrong after several minutes, and finish with a clearly audible or visible mismatch. The cause can be a clock difference, a sample-rate or frame-rate mismatch, buffering behavior, a capture path that is not stable, or a file that needs a clean conversion.
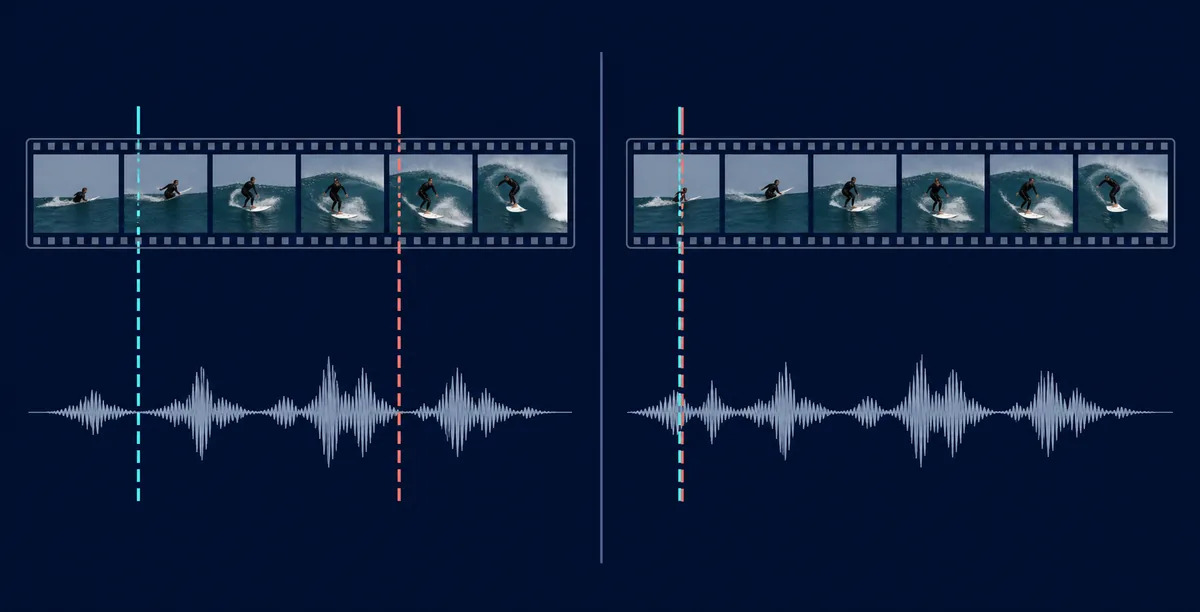
A fixed audio delay is easier to recognize: the sound is early or late by approximately the same amount at every point. If a clip is 120 milliseconds late at the start and still about 120 milliseconds late at the end, one offset may be enough. If it is close at the start, 300 milliseconds late in the middle and much worse at the end, adding 120 milliseconds will only move the first moment; it cannot correct the changing rate. The audio latency guide covers fixed latency and user-visible delay, while this page focuses on the growing gap.
The wording matters because the first repair attempt is different. Do not keep changing a player offset when the gap grows. Measure the slope of the mismatch first, then inspect the source file, the capture clock, the conversion settings and the real playback path.
| What you observe | More likely explanation | First useful check |
|---|---|---|
| The same gap everywhere | Fixed player, display or output offset | Compare the first and last minute, then adjust one offset only if it stays constant. |
| Small at the start, large at the end | Audio-video drift or clock/sample-rate mismatch | Mark the same event at the beginning, middle and end. |
| Sudden jumps or repeated skips | Buffering, dropped frames, CPU load or an unstable link | Check the real app and workload, not only a short browser test. |
| Only one file is wrong | Bad source, variable frame rate or conversion issue | Test a second file and inspect the source/export settings. |
How to test for audio drift without guessing
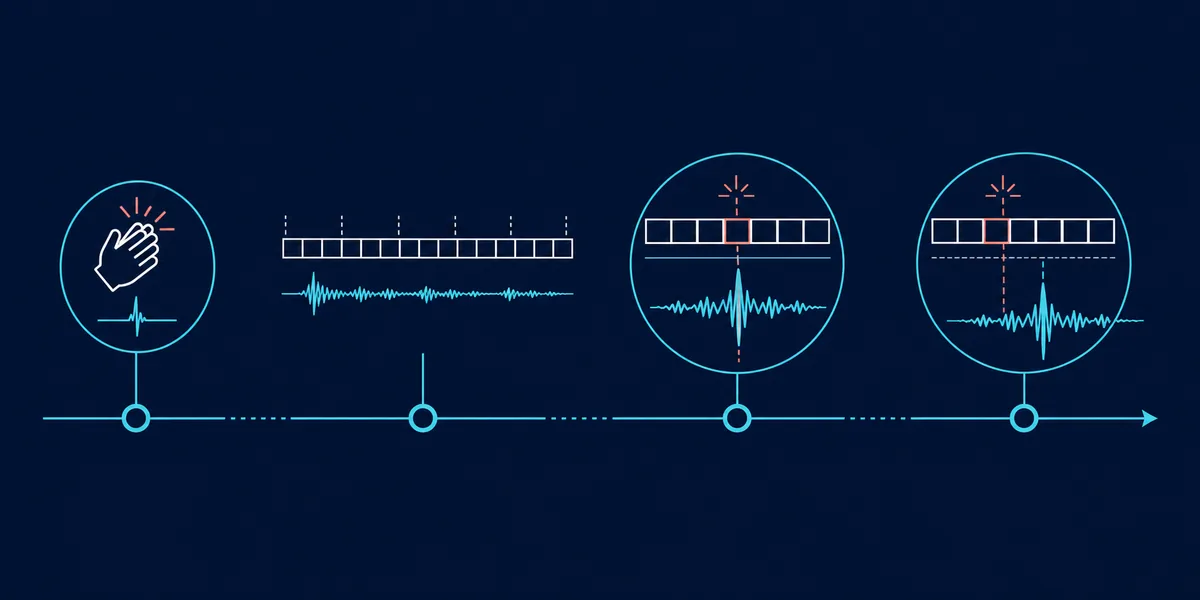
Use one unchanged piece of content with a sharp, easy-to-find event: a clap, a flash, a drum hit, a spoken consonant or a cut with a clear sound. Do not pause, change playback speed or switch devices during the check. You are not trying to make a laboratory measurement; you are testing whether the timing relationship stays stable on the path that matters.
Start with the Audio Sync Test when you need a quick visual-and-audio reference, then confirm the result with the actual file, player, capture card or stream that shows the problem. If the same event is aligned near the start but separated near the end, record the direction and approximate change. If the gap is constant, return to a fixed-offset diagnosis instead of calling it drift.
A browser estimate is useful for comparison but cannot reveal every internal clock or buffer. For a long recording, use the same content at three points: near the beginning, around the middle and close to the end. A pattern that repeats across two plays is stronger evidence than one reaction to a single short clip.
- Keep the path unchanged
Use the same file, player, output device, sample-rate setting and display route for the complete check.
- Mark the beginning
Write down whether the first clear event is aligned, early or late, and estimate the gap in milliseconds or frames if the tool provides it.
- Check the middle
Repeat the observation on an event near the midpoint. A larger gap in the same direction is stronger drift evidence.
- Check the end
Compare the final section and note whether the gap is stable, growing, jumping or corrected by the player.
- Repeat once
Run the same check a second time before changing settings. Consistent movement is more useful than a single surprising result.
Common causes of audio-video drift
The word drift describes the symptom, not one universal fault. The right fix depends on where the two timelines were created and where they are being played. A long camera recording, an OBS capture, a converted video file and a browser stream can all drift for different reasons.
Sample-rate and frame-rate mismatches are a common starting point. If audio and video are produced with different timing assumptions, the first seconds can look acceptable while the accumulated difference grows. Variable frame rate, clock differences between devices, a resampling step, and a capture source that drops or repeats frames can produce a similar pattern. Check the source and export settings before applying a permanent offset.
Buffering and scheduling can look like drift but often produce jumps. A loaded CPU, unstable USB or network path, Bluetooth retransmissions, dropped frames or a browser tab competing for resources can make the gap change suddenly. If the mismatch resets after a seek or only appears during a live workload, investigate the application path and stability before stretching the entire file.
| Pattern | Possible cause | Useful next action |
|---|---|---|
| Gradual, one-direction growth | Clock, sample-rate or frame-rate mismatch | Match the source settings and use a controlled resample or conform step. |
| Only after capture or streaming begins | Capture-card buffering, USB load or source-clock behavior | Check the capture path, audio format and dropped-frame indicators. |
| Random jumps or pauses | Buffer underrun, network congestion, CPU or display scheduling | Repeat under a lighter workload and compare a local file. |
| One exported file only | Variable frame rate, bad transcode or damaged source timing | Re-export or transcode from the source with explicit timing settings. |
How to fix audio drift in recordings and long files
First preserve the original file. Make a copy for each repair attempt and write down the start, middle and end observations. If the file is important, do not overwrite the only source with a guessed stretch or a permanent offset. The goal is to make the timing rate agree, not merely to make one timestamp look right.
For an exported or converted file, use a controlled workflow: identify the source frame rate and audio sample rate, avoid mixing variable and constant frame-rate assumptions without a reason, and resample or conform the audio in the application that owns the timeline. A clean transcode can repair a container or timing interpretation problem, but it cannot recreate missing audio or video frames. If the source itself was recorded with two unsynchronized clocks, the cleanest result may require re-recording or syncing the tracks before the final export.
A small, steady mismatch can sometimes be corrected by changing the audio duration to match the video duration. Treat that as a deliberate edit based on measurements at the beginning and end, not as a universal audio-delay setting. Check speech, music transients and lip sync at several points after the change. If the correction makes one section worse, stop and return to the source and format settings.
Duplicate the source and record the observed gap before every export, stretch or resample.
Check sample rate, frame rate, variable-frame-rate behavior and the timeline interpretation before editing duration.
A good repair improves the beginning, middle and end without introducing new drift, clipping or missing frames.
Fix drift in OBS, VLC, browsers and live playback
If the problem happens only in OBS, start with the capture and monitoring path rather than changing every Windows output setting. The OBS audio delay guide covers capture-card buffering, Sync Offset, sample-rate checks and drift that grows during a stream. Verify the recording or stream at the beginning and end; a Sync Offset is useful for a fixed gap but cannot correct a rate mismatch by itself.
If one local file is out of sync in VLC, compare another player and another file before changing the default offset. The VLC audio delay guide explains how to use a temporary offset and how to reset it. A temporary player correction is appropriate when the file has a stable offset; growing drift calls for source or conversion work instead.
For a browser or streaming service, test a second video, an incognito or clean session, and a different output path. If only one video drifts, the upload or encoded file may be the cause. If every video drifts on one TV, soundbar or Bluetooth path, follow the relevant PC audio delay test and Windows 11 audio latency guide to separate a playback offset from a changing clock or buffer problem.
- Reproduce in the real application
Use the same source and workload that produced the problem; a short browser test may not expose a long-stream issue.
- Separate offset from drift
Compare the beginning and end before entering a positive or negative sync offset.
- Change one layer
Test the file, application, capture device, output device and display path one at a time so the result remains explainable.
- Verify after seeking
Check both continuous playback and a seek or reconnect. A reset after seeking suggests buffering or application state rather than a permanent file rate.
Verify the audio drift fix before keeping it
A repair passes only when the timing stays stable across the whole section you care about. Replay the same source from the beginning, inspect an event near the middle and check the final section. Then test the practical use case: speech and lips, a music transient, a game event, a capture-card source or a live microphone. A setting that looks correct on one clap may still be wrong for a long stream.
Keep a short note with the source, application, output device, sample rate, frame rate, repair applied and observations at the three checkpoints. This makes it easier to undo a bad export and prevents a working player offset from being copied into unrelated files. If the gap stays constant after repair, the remaining problem is probably a fixed delay and can be handled with the appropriate player or device control.
If drift returns only under load, stop treating it as a file-editing problem. Reduce extra audio software, check USB and network stability, compare a local source, inspect dropped frames and repeat the same test. The Audio Sync Test can provide a repeatable reference, but the final decision should be based on the actual path and content that users hear and see.
The first clear event should match the chosen reference without needing an extreme offset.
The same event or a comparable marker should not move farther away as the timeline advances.
The final section should remain usable after continuous playback, not only immediately after a seek.
When to stop adjusting and return to the source
Browser and player checks are practical diagnostics, not certified laboratory measurements. Human reaction time, display refresh, audio buffering, Bluetooth behavior, microphone placement and the current workload can affect what you see and hear. Use the same conditions for comparisons, repeat the observation and avoid claiming a precise drift rate from one short clip.
For broadcast, product validation or detailed post-production compensation, use tools designed to compare clocks, frames and audio samples with a known reference. If the original recording used an unstable clock, dropped frames or a damaged source, a new capture may be safer than a chain of increasingly aggressive edits. The useful outcome is a stable, explainable timeline—not a number that looks better at one timestamp.
Separate a fixed offset from a growing gap and choose the next troubleshooting layer.
Do not compare different files, players, screen paths or workloads as if they were one measurement.
Use calibrated tools or re-record from a stable source when the timing must be production-accurate.
Check the beginning, middle and end
Start with a repeatable audio sync reference, then verify the exact file, app or device path where the drift appears.
Audio drift FAQ
How do I fix audio drift?
First confirm that the gap grows between the beginning and end. Then check sample rate, frame rate, variable-frame-rate behavior, capture clocks and conversion settings. A controlled resample, conform or transcode can help when the source timing is sound; if the original clocks were unstable or frames were lost, re-recording may be safer.
What if video and audio have different timing?
Compare the same event at the beginning, middle and end. A constant gap is a fixed offset; a gap that grows is drift. Use a player offset only for a stable offset, and investigate the source, clock, format or capture path when the separation changes.
Why are audio and video synced at the start but not at the end?
The timing rates are not staying identical. Common possibilities include different clocks, sample-rate or frame-rate interpretation, variable frame rate, dropped frames, buffering or a conversion problem. Test a second file and check the real application before editing the whole track.
Can I fix audio drift by delaying the audio?
Only when the mismatch is constant. Delaying the audio moves the entire track by one amount; it cannot make a growing gap stay aligned. Measure at multiple time points before choosing a fixed offset.
How can I test audio drift on a PC?
Use one unchanged file or stream, choose a clear clap or flash, and compare the marker near the beginning, middle and end. Keep the player, output device and display path unchanged, repeat once, and note whether the gap is constant, growing or jumping.
Should I stretch the audio to match the video?
A measured duration correction can work for a clean, steady drift, but do it on a copy and verify several points afterward. Do not stretch blindly when the source has dropped frames, unstable capture or a damaged clock relationship; fix the source or re-record instead.
Why does drift appear only during a live stream?
A live path may add capture-card buffering, clock differences, USB or network instability, dropped frames or application scheduling changes. Reproduce it under the real workload, check the capture and sample-rate settings, and compare the beginning and end of the recording.
References for audio drift diagnosis
- Descript Help: Repair audio driftA first-party editing workflow for repairing audio that gradually moves out of sync.
- Netflix Studio Partner Help: Global sync driftProfessional delivery guidance that explains why timing differences accumulate across a long program.